

Barton suggested end of season deck hardware maintenance
It's worth spending a little time to carry out some hardware checking and cleaning when you lay your yacht up for the winter as this can save you money in the long run and prevent a future failure next season. Don't forget to also wash through, dry and stow away non essential halyards and sheets; they will last longer and will be clean for next season
Here is a suggested laying up check list for your boat:
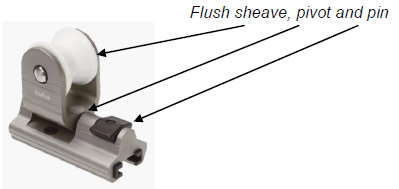
For blocks and sheaves
Flush through with fresh water, this helps dislodge and remove salt crystals. You can also clean through using a mild detergent with water (make sure it is ecologically friendly though). Do not oil or grease, as this attracts abrasive dust and grime which can build up over the winter.
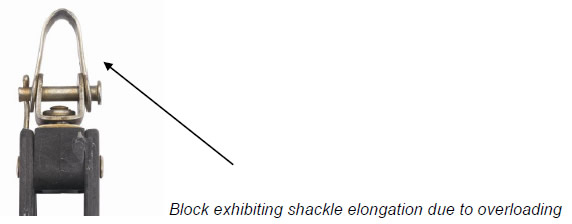
Check the sheave rotation, excessive movement on the bearing would suggest it is worn out. Also check for signs of elongation around the fixing holes and shackle at the head of the block, as this would suggest overloading.
If in any doubt take it off and replace it with a higher load block, this especially applies to mast head blocks which are not so easy to inspect.
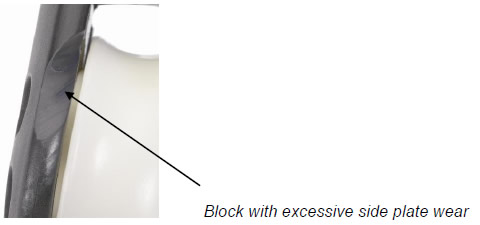
Look at the block side plates for wear on the inside edge, excessive wear suggests a foul lead, so you may need to replace with a swivel head for better articulation before the season starts again.
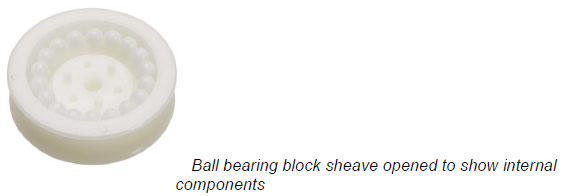
For ball bearing blocks, the sheaves should spin freely; again flush through with fresh water. Any graunching or uneven spin after flushing would suggest the block has been overloaded. Ball bearing blocks are not suitable for high static loads as the bearings will distort, replace with a plain bearing block or one with a higher rolling load rating.
For winches
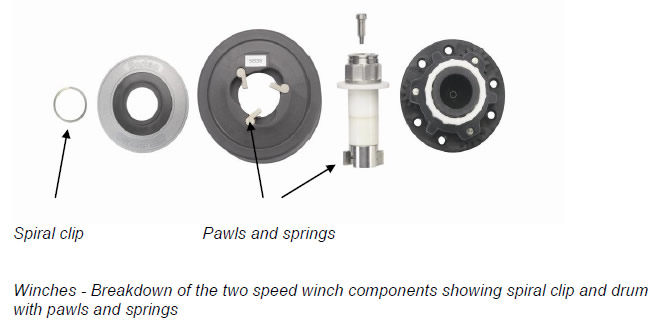
Undo the drum spiral circlip (or locating screw) and take off the drum before flushing through with warm fresh water. Gently agitate to remove any stubborn salt deposits, let it dry and give a light spray of WD40 to the gears. At this point you can remove all accessible pawls and springs. Any staining on the pawls can be removed with a proprietary household abrasive cleaner such as CIF with a scotchbrite pad. Flush with fresh water and leave to dry. On reassembly, add a squirt of WD40 to the springs and refit.
For Mainsheet Traveller and Genoa cars
Mainsheet traveller - Rinse thoroughly with a hose pipe and fresh water, especially the underbody where the ball bearings run in the car and along the track. Again you can use a mild detergent solution for stubborn salt deposits, as it will not harm the anodising.
Take time to look at the end fittings on the traveller. Crash gybes are usually the cause of fractures, add spare end fittings to your 'to do' list. You will need to remove the traveller car to do this, so be sure to seek out or source a short length of track to transfer the traveller car onto for repair. By taking it off now you will remember it needs attention. Flush through your control line cam cleats with water under pressure. The cams should open and return freely; a loose cam would suggest a broken spring, unbolt the cam cleat and pop in a bag with a note to purchase spare return springs. If you leave it fitted you will forget to do it in the spring.

Genoa Cars – flush through with fresh water and let them dry before removing them from the deck for storage. They are expensive items to replace and easy to lift from the boat.
For rope clutches
Flush through with fresh water and let dry. We then recommend a silicone based grease for the handle and cam pivot points only, but wait until the spring before you apply. If the halyard or control line is slipping, try and look at the cam face inside for wear. The handles can also fail on older rope clutches; tell tale signs are fractures around the pivot point, repair or replace as necessary. The best rope clutch manufacturers will offer spare handles and cams for you to install.
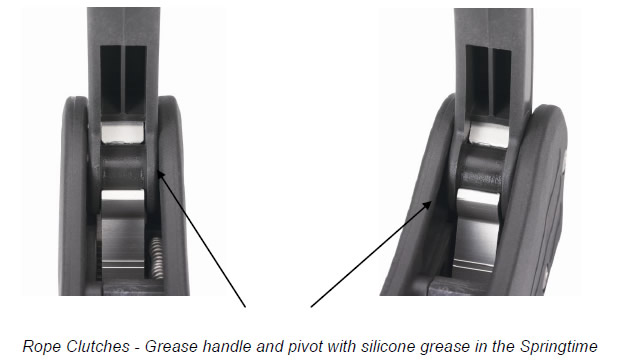
Make sure your lead deflection into the rope clutch is within 10 degrees, any more is putting excessive side load on the unit. You may need to purchase a Barton deck organiser to fit over the winter to address this.

